29
W W i i r r e e l l e e s s s s / / F F a a s s t t E E t t h h e e r r n n e e t t M M F F P P S S e e r r v v e e r r Quick Installation Guide Version: 2.0 (August, 2006)
WWiirreelleessss // FFaasstt EEtthheerrnneett
MMFFPP SSeerrvveerr
Quick Installation Guide
Version: 2.0 (August, 2006)
MMuullttii--LLaanngguuaaggeess QQIIGG iinn DDrriivveerr CCDD ====================================================================================================
ČČeesskkýý: Anglického průvodce rychlou instalací aleznete na přiloženém CD s ovladači
DDeeuuttsscchh:: Finden Sie bitte das englische QIG beiliegend in der Treiber CD (German)
EEssppaaññooll: Incluido en el CD el QIG en Ingles.
FFrraannççaaiiss:: Veuillez trouver l’anglais QIG ci-joint dans le CD driver
IIttaalliiaannoo:: Incluso nel CD il QIG in Inglese.
MMaaggyyaarr:: Az angol telepítési útmutató megtalálható a mellékelt CD-n
NNeeddeerrllaannddss: De engelstalige QIG treft u aan op de bijgesloten CD
PPoollsskkii: Skrócona instrukcja instalacji w języku angielskim znajduje się na załączonej płycie CD
PPoorrttuugguuêêss: Incluído no CD o QIG em inglês.
РРууссссккиийй:: Найдите QIG на анлийском языке на приложеном CD
1
English Version.
1. Product Introduction
Thank you for purchasing Edimax’s Fast Ethernet/802.11g/b Wireless LAN
MFP server. This MFP server allows your Multi-function, all-in-one printer
(called for short: MFP) to become a sharable device on the network. Unlike
many print servers, it can communicate with MFP as if it is connected directly
to your computer. Because of these features, all users can share printing,
scanning, card reading and fax through the network with minimal
configurations needed. Furthermore, the MFP Server supports bi-directional
communication so important information such as ink levels and paper levels
can be monitored on client machines.
The MFP server supports print, scan, card reader and fax sharing on most of
the popular operating systems: Windows 2000 SP4 above and XP SP1 above.
It also supports Windows XP scanning utility and MFP vendors’ scanning
utilities. Thus providing you with a bigger variety when choosing the right
software for you.
Despite the magnificent functions our MFP server can provide you with, this
MFP Server also act as a traditional print server. It supports TCP/IP network
protocol and LPR, RAW and IPP printing protocols. It can share print function
in the various common network operating systems Windows 98SE /Me /NT
/2000 /XP/2003, Unix, Linux and MAC OS 9.x above.
This MFP Server provides IEEE 802.11g/b wireless LAN (up to 54Mbps data
transfer rate), an Ethernet network port (10/100Mbps Ethernet) and a USB
2.0/1.1 port for MFP or printer. The MFP Server can be connected to your
802.11g/b wireless network or wired network. Thus providing you with more
flexibility when setting up your MFP server in your network.
The MFP server is the best solution for users to share MFP easily. It offers
flexible and manageable printing on your Local Area Network at a low cost
and with minimal setup and maintenance required.
2
2. Product Package
This package contains the following components:
One MFP Server
One Antenna (only for Wireless MFP Server)
One Power Adapter
One Quick Installation Guide
One CD-ROM (Including all the software utilities, drivers, Multi-language
QIG and User’s Manual)
3. Getting Started
Before you start, you should have:
One computer with Windows 2000 SP4 above and Windows XP SP1
above
One MFP or printer with USB port and an installation CD
One Category 5 Ethernet Cable
One USB Cable
3.1 Hardware Installation Procedure
1. Unpack the MFP Server package and verify that all the items listed in the
previous section are provided.
2. Plug the USB cable to the MFP Server with the MFP or printer that you
want to share on the network.
3. Connect the MFP Server to your network by attached the network cable to
the network port of the MFP server.
4. Connect the power adapter to the MFP Server. The MFP Server will
perform the Power-On-Self-Test (POST) after it is powered on. When the
Status LED is unlighted, the MFP Server is ready.
Note: 1. You must use the power adapter shipped along with the MFP Server,
do NOT use any other power adapter from other sources. 2. To avoid unnecessary compatibility issue, please power on the print
server before the printer.

3
3.2 Software Installation Procedure Before you start, you should check your computer’s operating system. This
program can be run in Windows 2000 SP4 above and Windows XP SP1
above. Please follow the steps below to start installation. For the installation
procedures in Windows 98SE/ME/NT and other operating systems, please
refer to the manual of the MFP Server.
Tip: You have to uninstall all the MFP server drivers and utilities if you have
installed the previous version.
1. Insert the CD shipped along with the MFP Server into your CD-ROM drive.
The Autorun.exe program should be executed automatically. If not, run
Autorun.exe manually from CD-ROM drive’s root directory
2. The following screen will be displayed. Click “Setup Utility”.
4
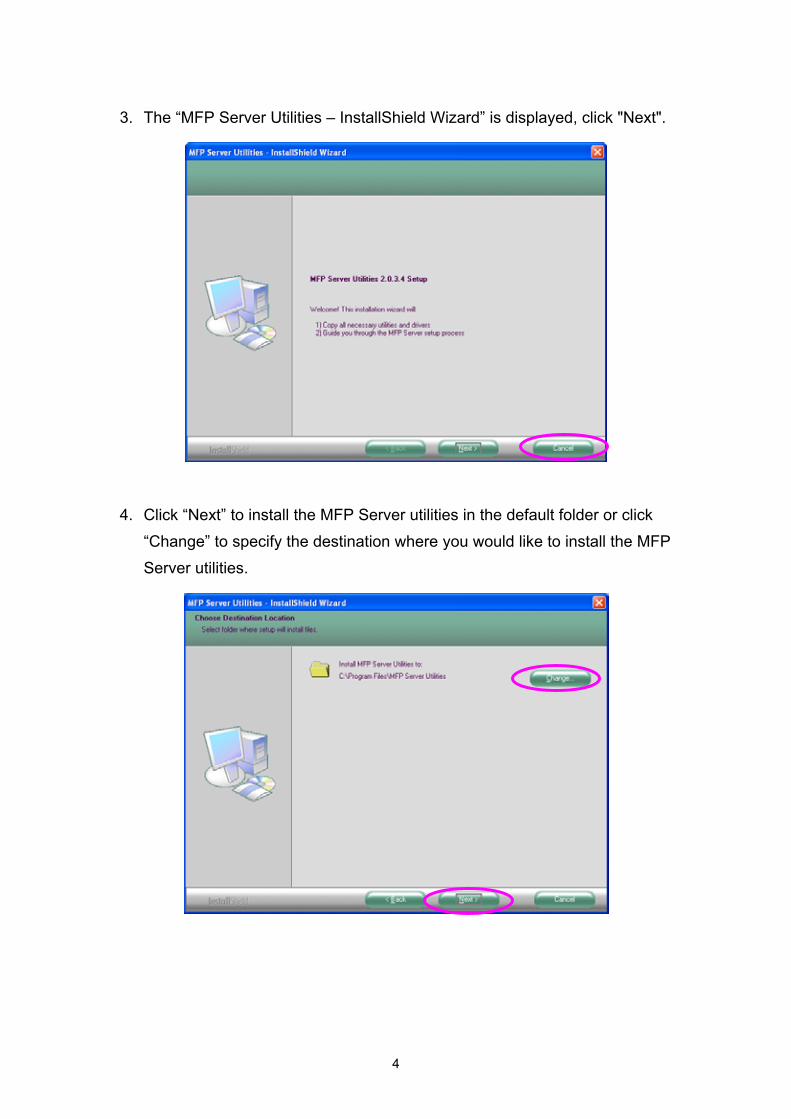
3. The “MFP Server Utilities – InstallShield Wizard” is displayed, click "Next".
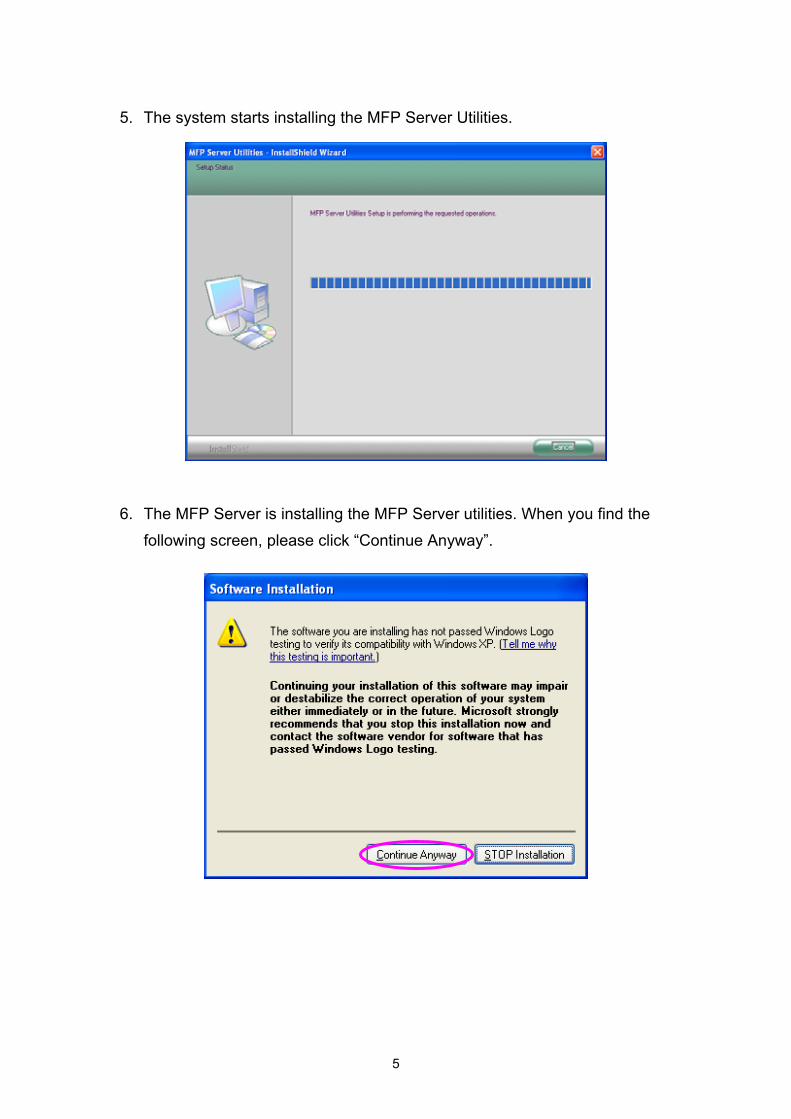
4. Click “Next” to install the MFP Server utilities in the default folder or click
“Change” to specify the destination where you would like to install the MFP
Server utilities.
5
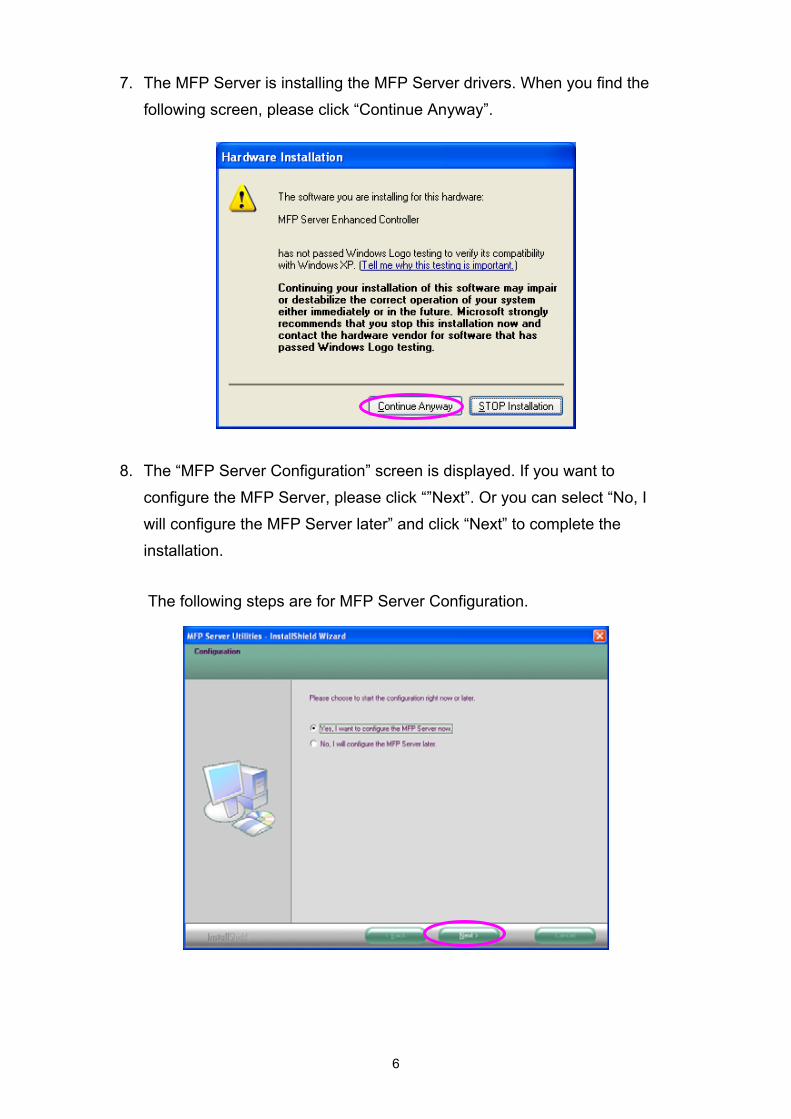
5. The system starts installing the MFP Server Utilities.
6. The MFP Server is installing the MFP Server utilities. When you find the
following screen, please click “Continue Anyway”.
6
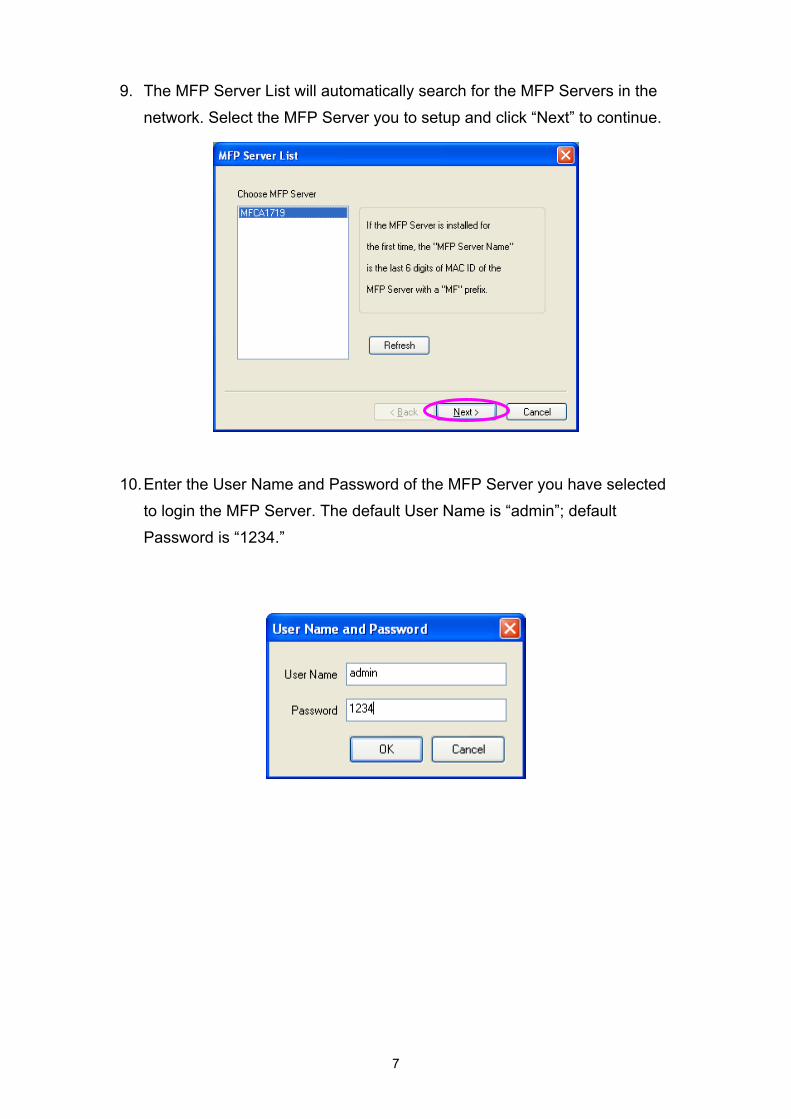
7. The MFP Server is installing the MFP Server drivers. When you find the
following screen, please click “Continue Anyway”.
8. The “MFP Server Configuration” screen is displayed. If you want to
configure the MFP Server, please click “”Next”. Or you can select “No, I
will configure the MFP Server later” and click “Next” to complete the
installation.
The following steps are for MFP Server Configuration.
7
9. The MFP Server List will automatically search for the MFP Servers in the
network. Select the MFP Server you to setup and click “Next” to continue.
10. Enter the User Name and Password of the MFP Server you have selected
to login the MFP Server. The default User Name is “admin”; default
Password is “1234.”
8
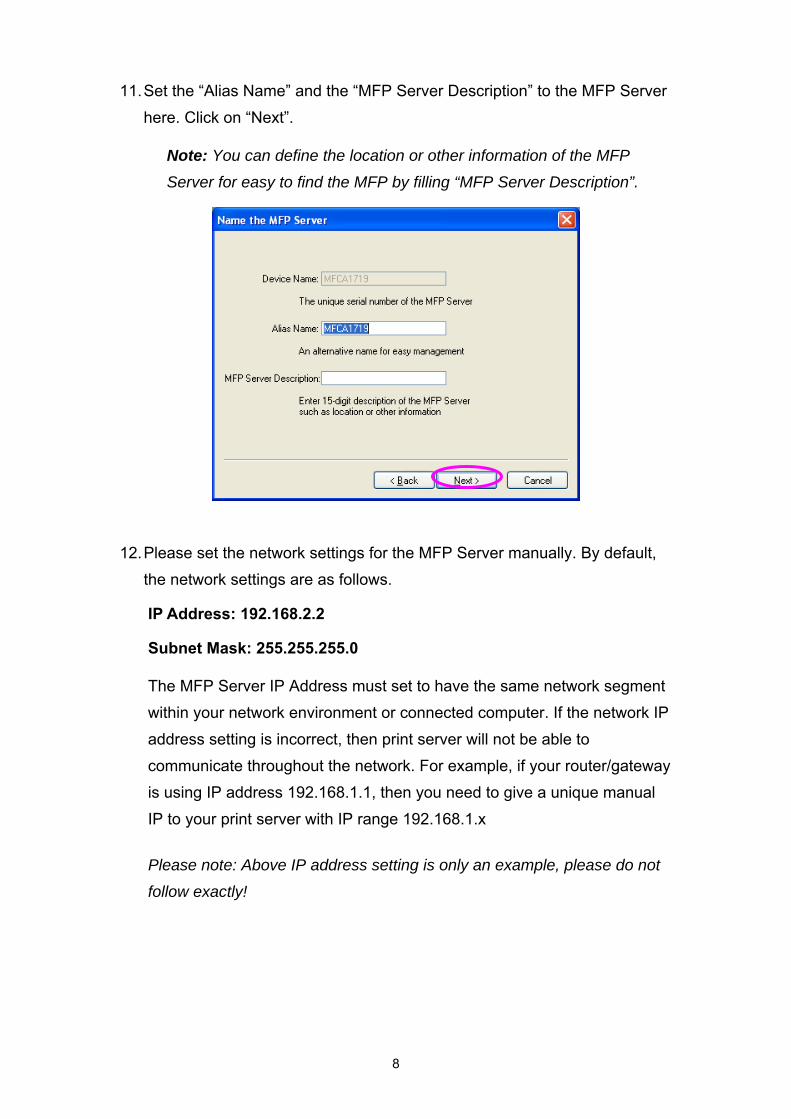
11. Set the “Alias Name” and the “MFP Server Description” to the MFP Server
here. Click on “Next”.
Note: You can define the location or other information of the MFP
Server for easy to find the MFP by filling “MFP Server Description”.
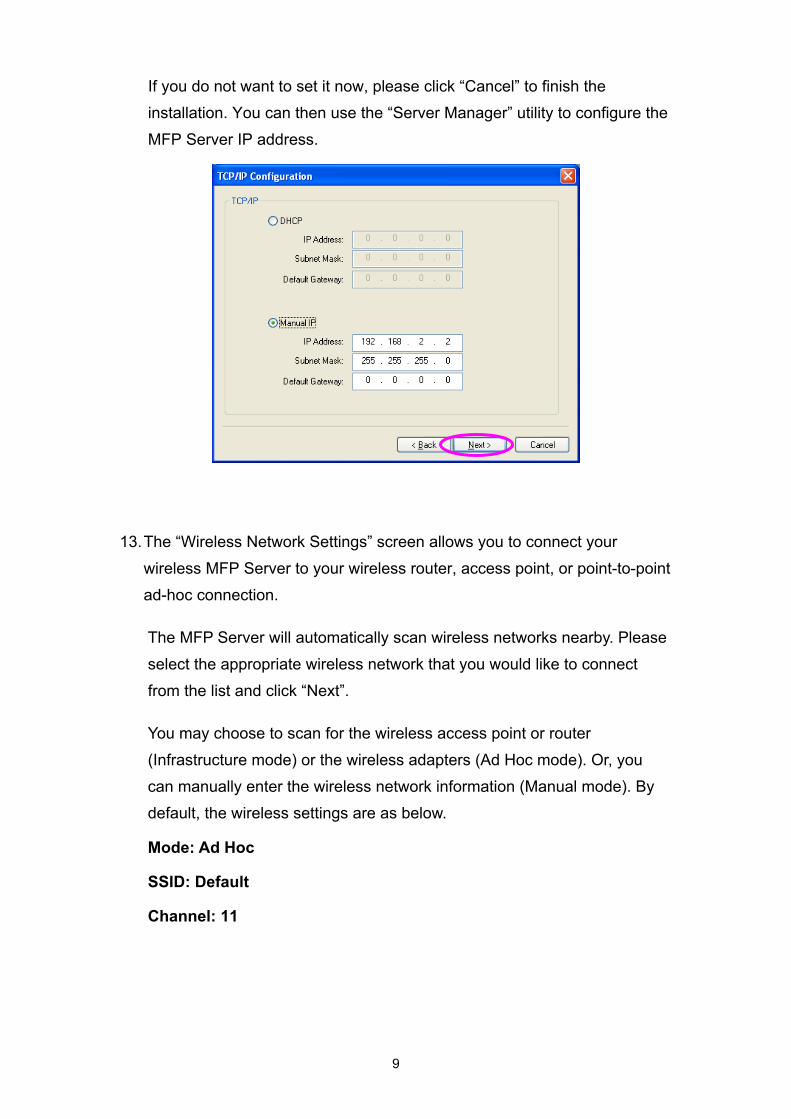
12. Please set the network settings for the MFP Server manually. By default,
the network settings are as follows.
IP Address: 192.168.2.2
Subnet Mask: 255.255.255.0
The MFP Server IP Address must set to have the same network segment
within your network environment or connected computer. If the network IP
address setting is incorrect, then print server will not be able to
communicate throughout the network. For example, if your router/gateway
is using IP address 192.168.1.1, then you need to give a unique manual
IP to your print server with IP range 192.168.1.x
Please note: Above IP address setting is only an example, please do not
follow exactly!
9
If you do not want to set it now, please click “Cancel” to finish the
installation. You can then use the “Server Manager” utility to configure the
MFP Server IP address.
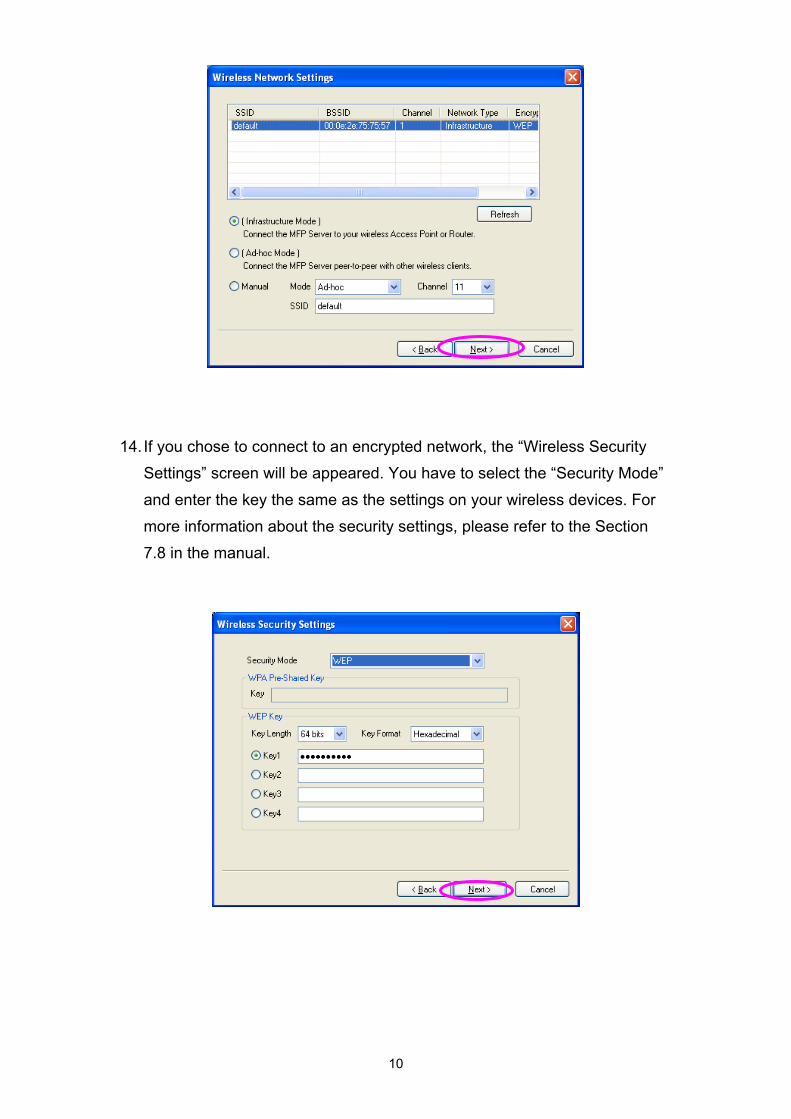
13. The “Wireless Network Settings” screen allows you to connect your
wireless MFP Server to your wireless router, access point, or point-to-point
ad-hoc connection.
The MFP Server will automatically scan wireless networks nearby. Please
select the appropriate wireless network that you would like to connect
from the list and click “Next”.
You may choose to scan for the wireless access point or router
(Infrastructure mode) or the wireless adapters (Ad Hoc mode). Or, you
can manually enter the wireless network information (Manual mode). By
default, the wireless settings are as below.
Mode: Ad Hoc
SSID: Default
Channel: 11
10
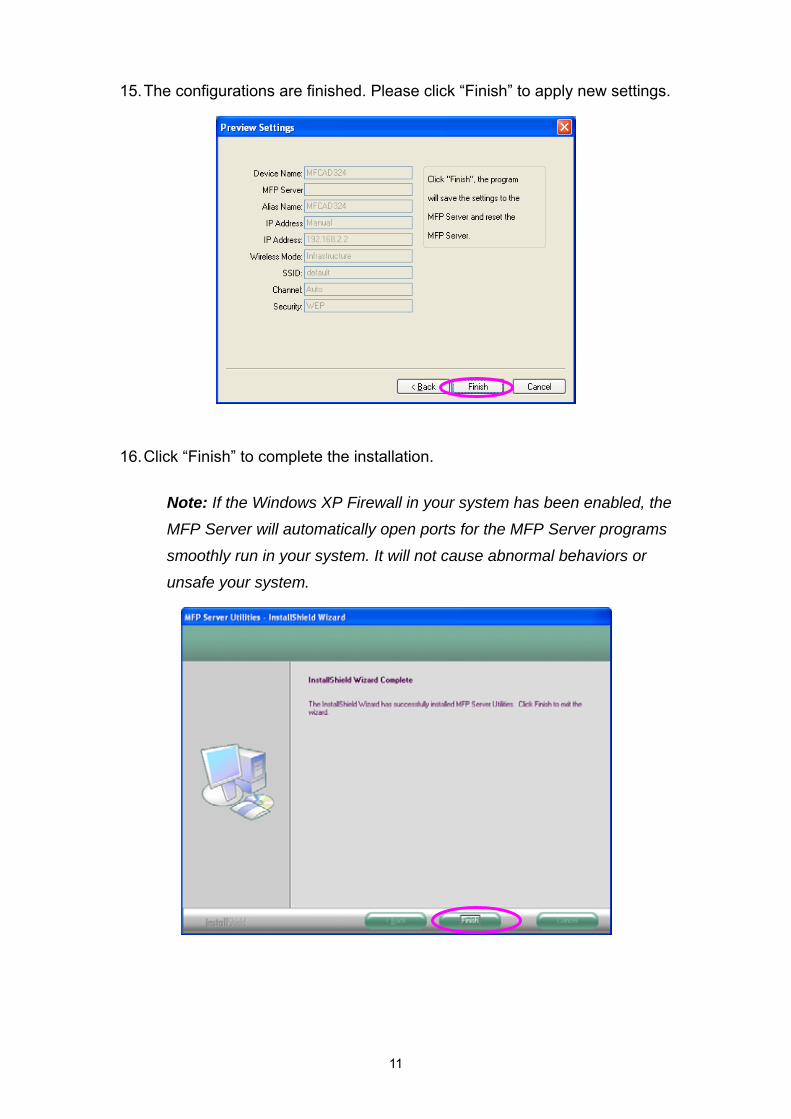
14. If you chose to connect to an encrypted network, the “Wireless Security
Settings” screen will be appeared. You have to select the “Security Mode”
and enter the key the same as the settings on your wireless devices. For
more information about the security settings, please refer to the Section
7.8 in the manual.
11
15. The configurations are finished. Please click “Finish” to apply new settings.
16. Click “Finish” to complete the installation.
Note: If the Windows XP Firewall in your system has been enabled, the
MFP Server will automatically open ports for the MFP Server programs
smoothly run in your system. It will not cause abnormal behaviors or
unsafe your system.
12
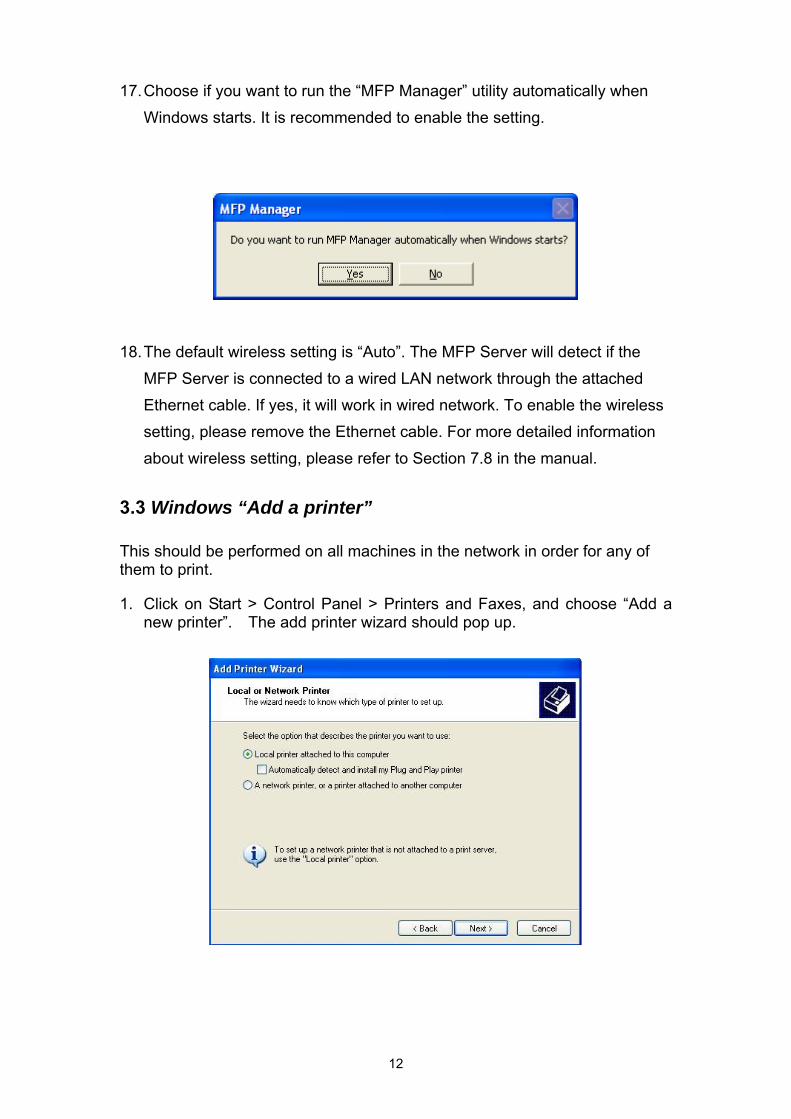
17. Choose if you want to run the “MFP Manager” utility automatically when
Windows starts. It is recommended to enable the setting.
18. The default wireless setting is “Auto”. The MFP Server will detect if the
MFP Server is connected to a wired LAN network through the attached
Ethernet cable. If yes, it will work in wired network. To enable the wireless
setting, please remove the Ethernet cable. For more detailed information
about wireless setting, please refer to Section 7.8 in the manual.
3.3 Windows “Add a printer”
This should be performed on all machines in the network in order for any of them to print.
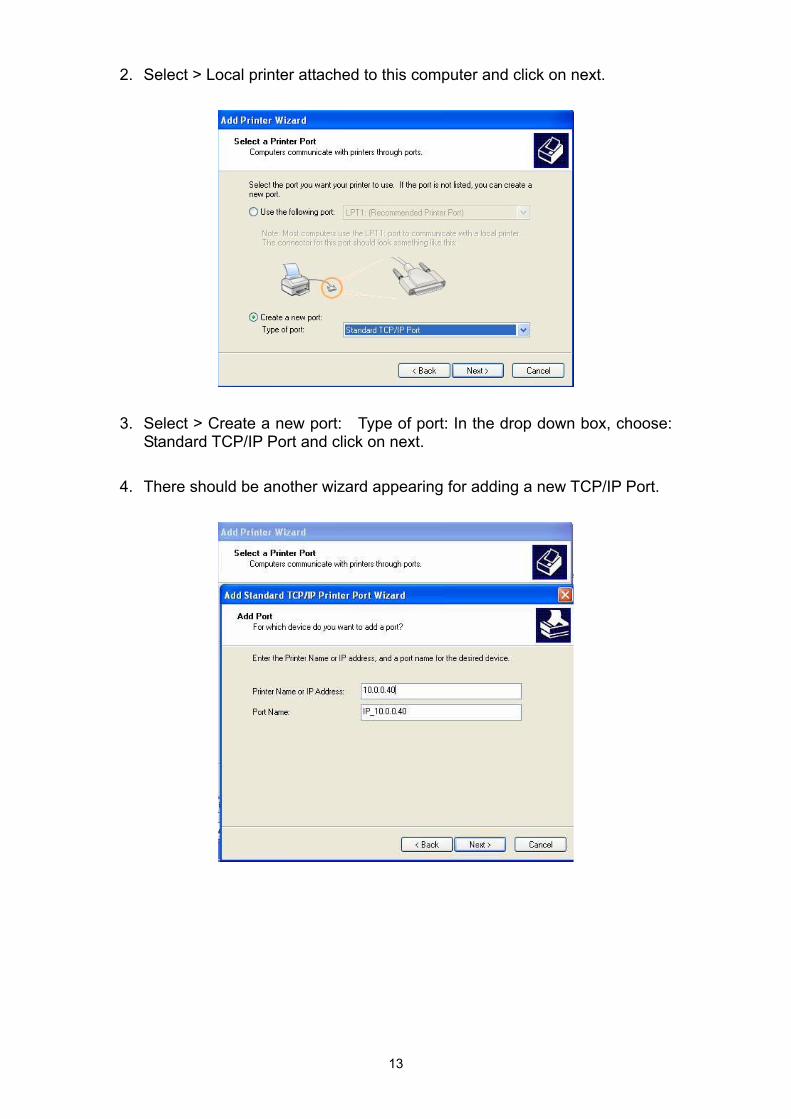
1. Click on Start > Control Panel > Printers and Faxes, and choose “Add a new printer”. The add printer wizard should pop up.
13
2. Select > Local printer attached to this computer and click on next.
3. Select > Create a new port: Type of port: In the drop down box, choose:
Standard TCP/IP Port and click on next.
4. There should be another wizard appearing for adding a new TCP/IP Port.
14
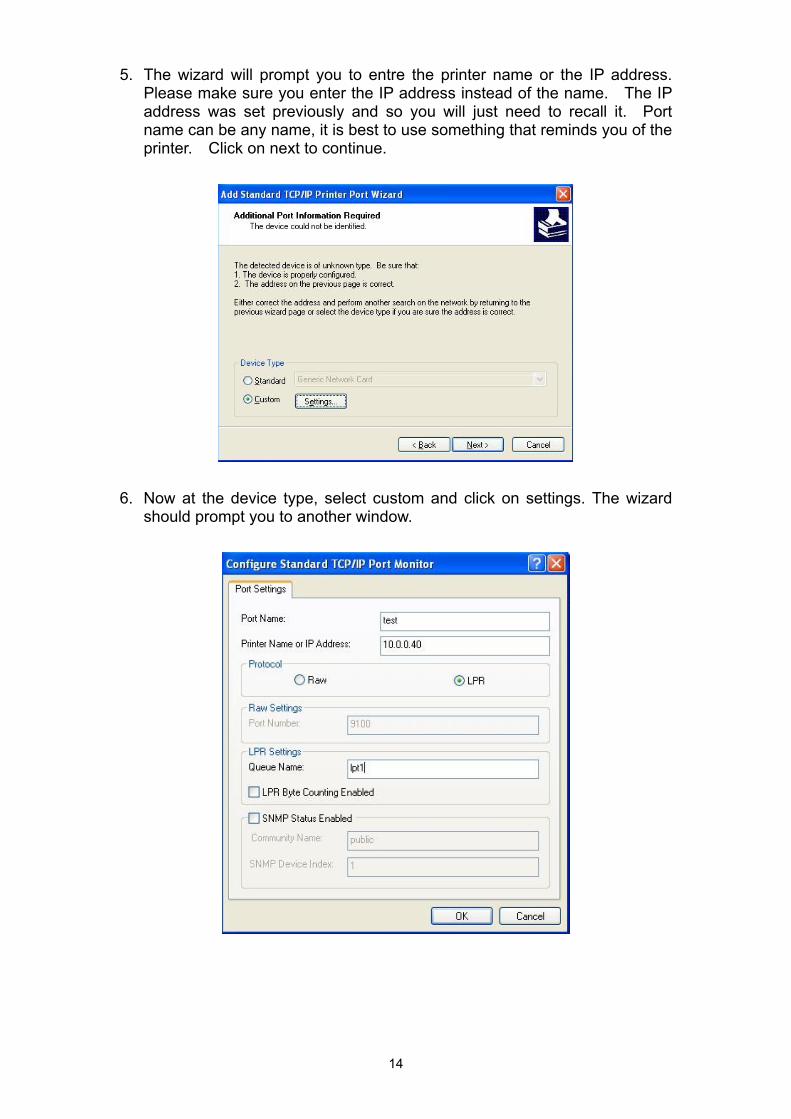
5. The wizard will prompt you to entre the printer name or the IP address. Please make sure you enter the IP address instead of the name. The IP address was set previously and so you will just need to recall it. Port name can be any name, it is best to use something that reminds you of the printer. Click on next to continue.
6. Now at the device type, select custom and click on settings. The wizard
should prompt you to another window.
15
7. This is the setting window when you click on setting on the previous device type settings. The port name and the IP address would be pre-entered for you from the previous settings. At the protocol line, choose LPR and then you will be able to type in LPR settings. Type lpt1 on the queue name and press OK.
8. After you press OK, you will return back to the device type window. Click
Next to continue with the setup.
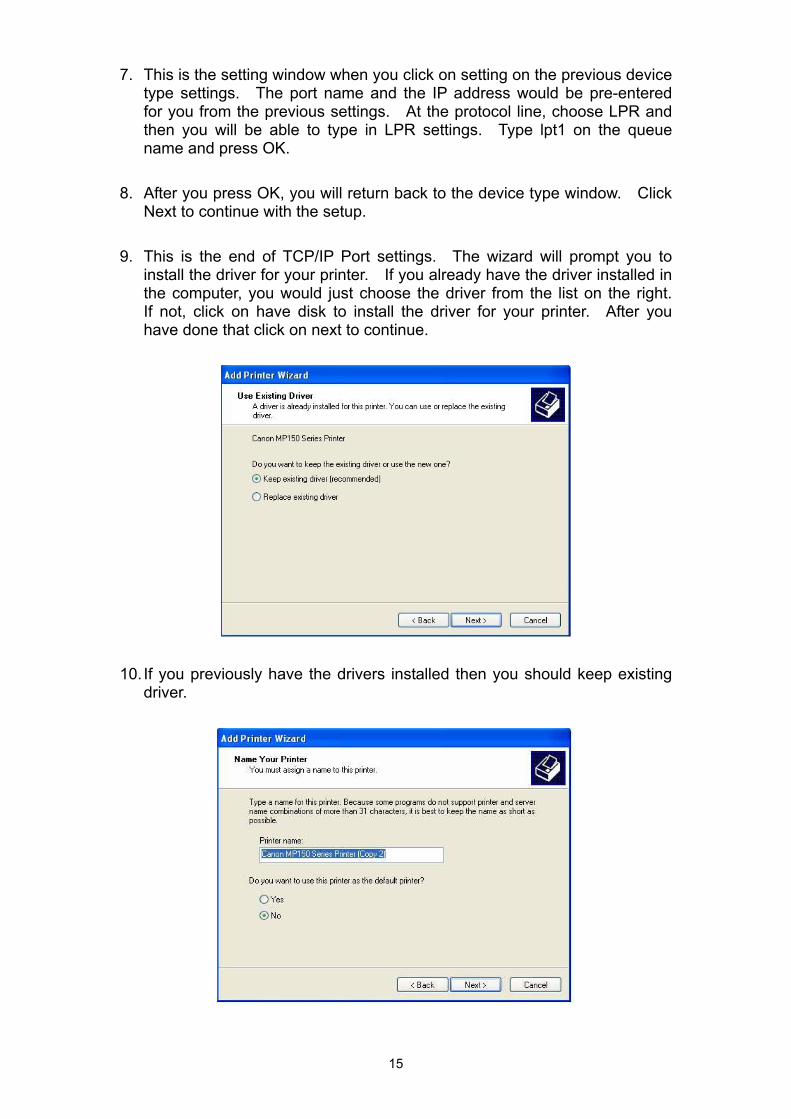
9. This is the end of TCP/IP Port settings. The wizard will prompt you to
install the driver for your printer. If you already have the driver installed in the computer, you would just choose the driver from the list on the right. If not, click on have disk to install the driver for your printer. After you have done that click on next to continue.
10. If you previously have the drivers installed then you should keep existing
driver.
16
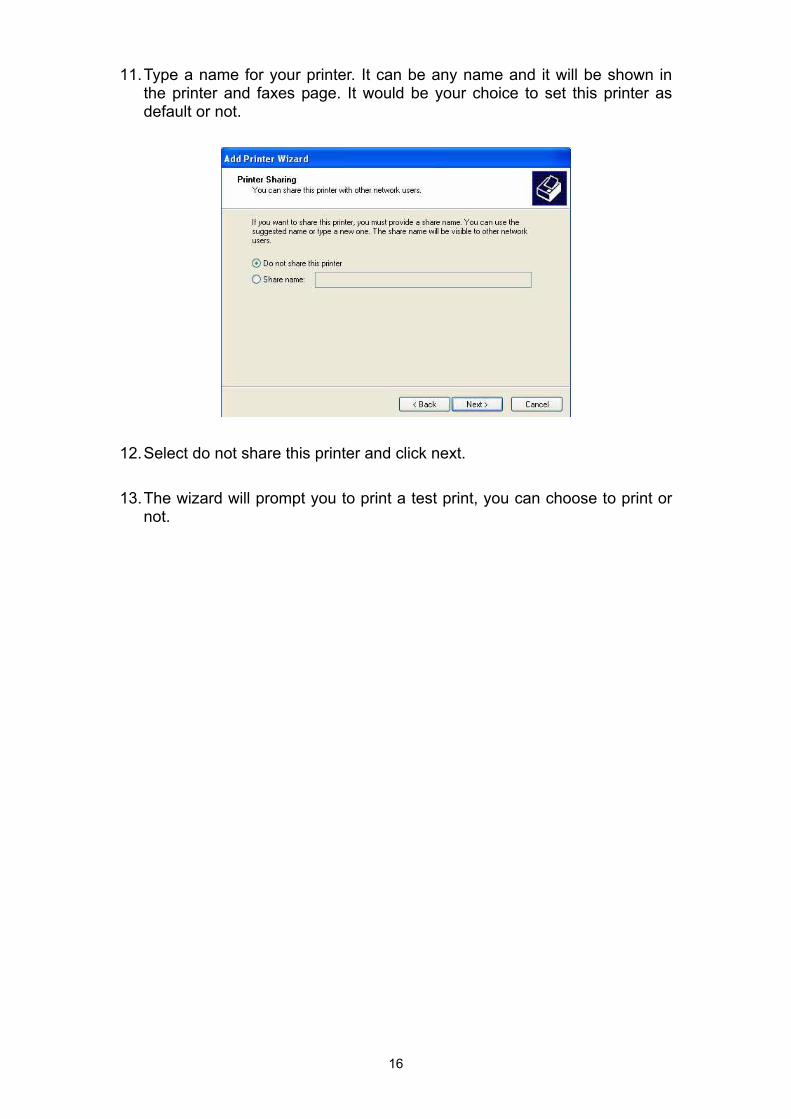
11. Type a name for your printer. It can be any name and it will be shown in the printer and faxes page. It would be your choice to set this printer as default or not.
12. Select do not share this printer and click next.
13. The wizard will prompt you to print a test print, you can choose to print or
not.
17
3.4 MFP Server Utilities
After the installation is completed, there will be three utilities and a text file in
the MFP Server’s Program folder.
MFP Manager – Allows you to manage the connection between the MFP and
your computer for sharing MFP function.
Server Configuration – Allows you to configure the MFP Server’s IP Address,
network protocols and other advanced features. It also allows you to manage
the MFP Server.
Uninstall – Assistant for removing all installed MFP Server software
programs.
About Version – Display the version of each utility including in the MFP
Server software programs.
18
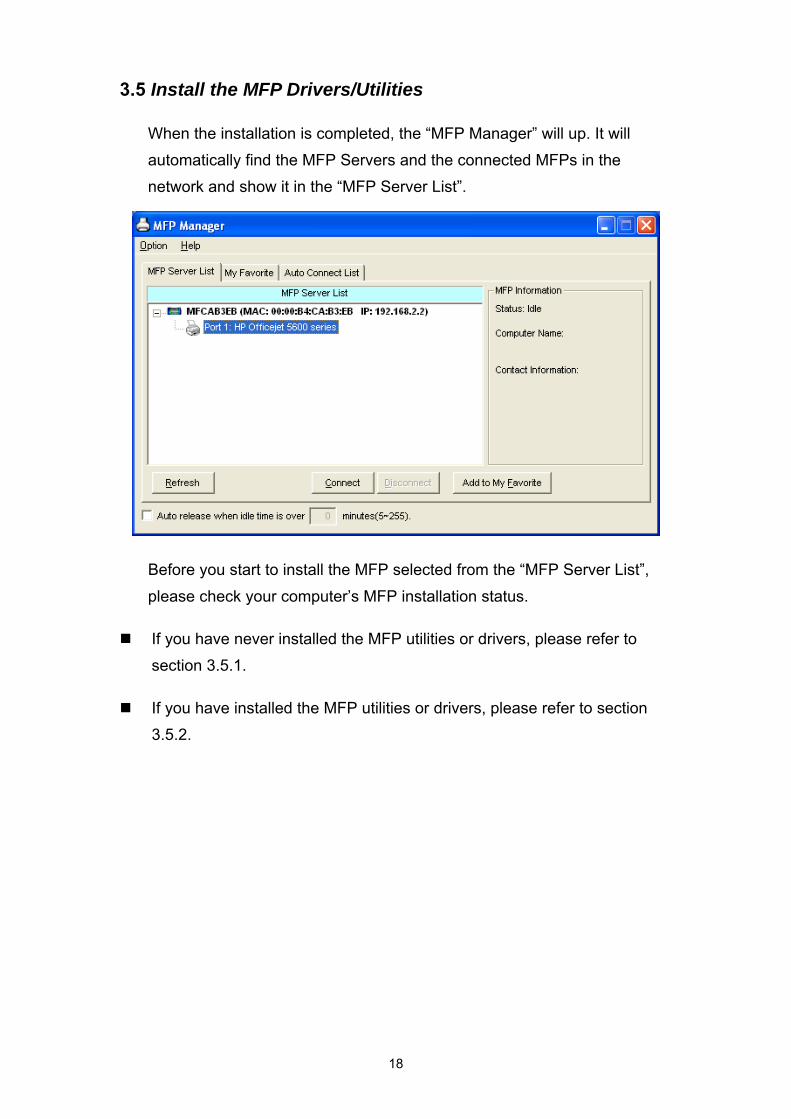
3.5 Install the MFP Drivers/Utilities
When the installation is completed, the “MFP Manager” will up. It will
automatically find the MFP Servers and the connected MFPs in the
network and show it in the “MFP Server List”.
Before you start to install the MFP selected from the “MFP Server List”,
please check your computer’s MFP installation status.
If you have never installed the MFP utilities or drivers, please refer to
section 3.5.1.
If you have installed the MFP utilities or drivers, please refer to section
3.5.2.
19
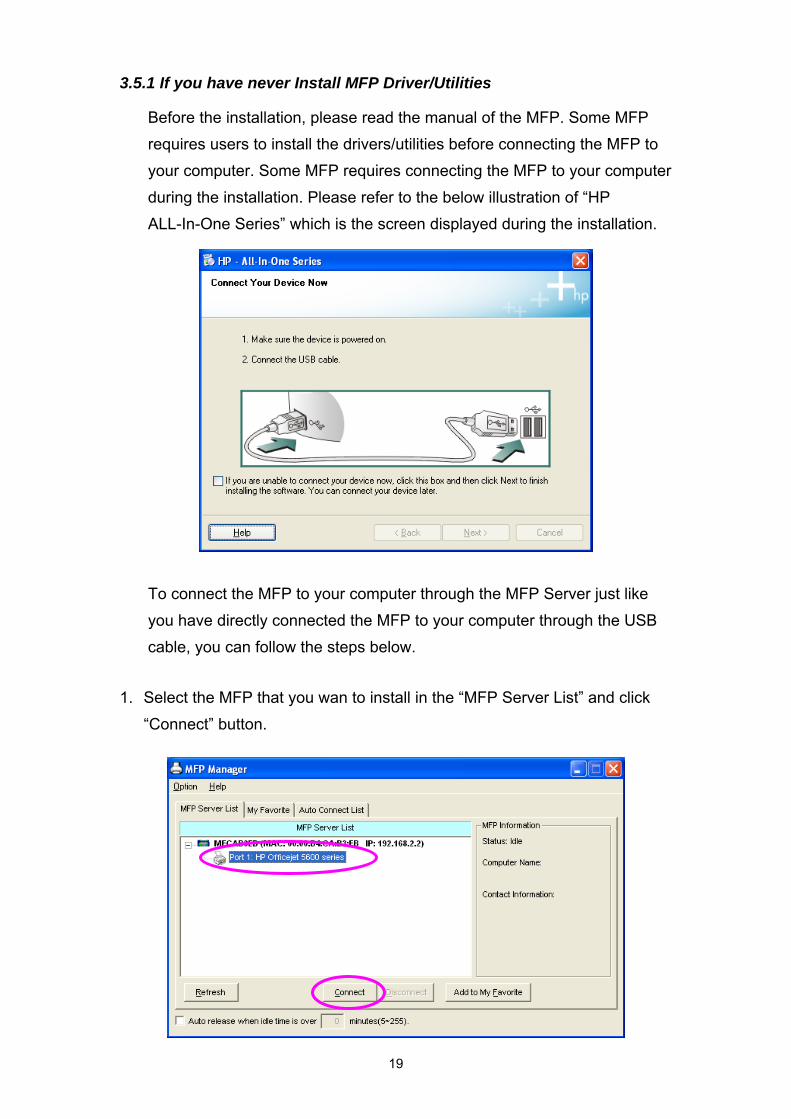
3.5.1 If you have never Install MFP Driver/Utilities
Before the installation, please read the manual of the MFP. Some MFP
requires users to install the drivers/utilities before connecting the MFP to
your computer. Some MFP requires connecting the MFP to your computer
during the installation. Please refer to the below illustration of “HP
ALL-In-One Series” which is the screen displayed during the installation.
To connect the MFP to your computer through the MFP Server just like
you have directly connected the MFP to your computer through the USB
cable, you can follow the steps below.
1. Select the MFP that you wan to install in the “MFP Server List” and click
“Connect” button.
20
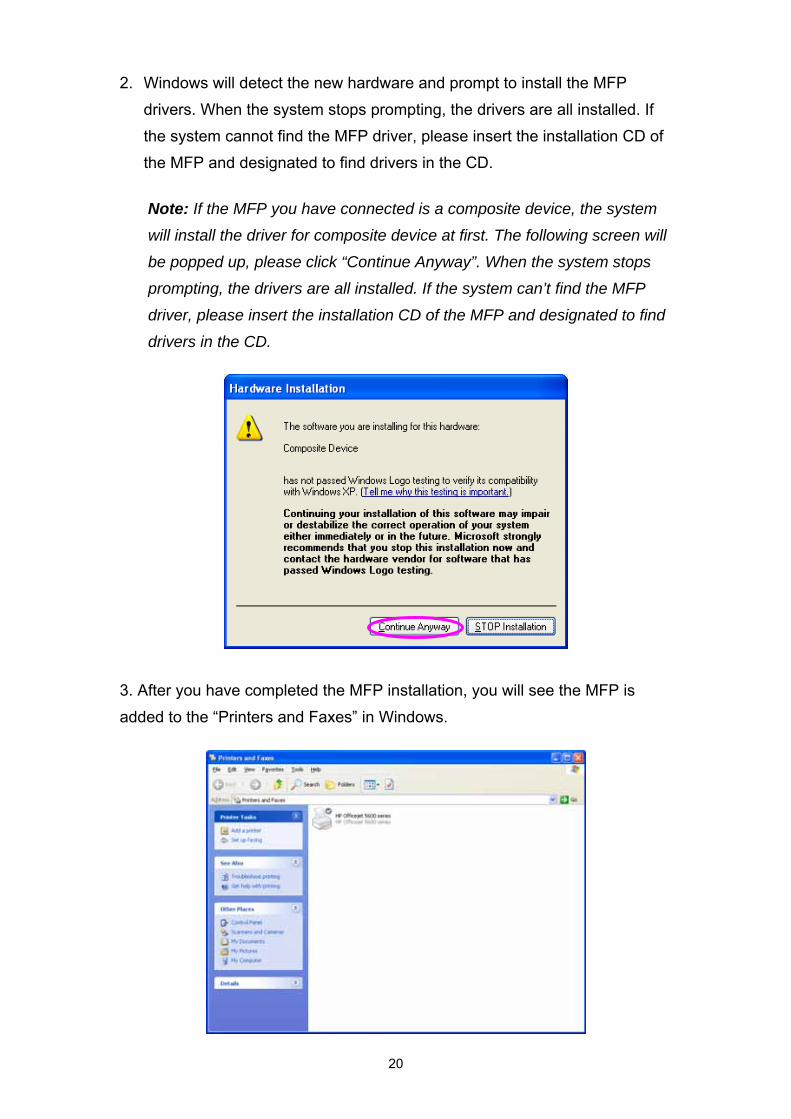
2. Windows will detect the new hardware and prompt to install the MFP
drivers. When the system stops prompting, the drivers are all installed. If
the system cannot find the MFP driver, please insert the installation CD of
the MFP and designated to find drivers in the CD.
Note: If the MFP you have connected is a composite device, the system
will install the driver for composite device at first. The following screen will
be popped up, please click “Continue Anyway”. When the system stops
prompting, the drivers are all installed. If the system can’t find the MFP
driver, please insert the installation CD of the MFP and designated to find
drivers in the CD.
3. After you have completed the MFP installation, you will see the MFP is
added to the “Printers and Faxes” in Windows.
21
3.5.2 MFP Drivers/Utilities has been installed
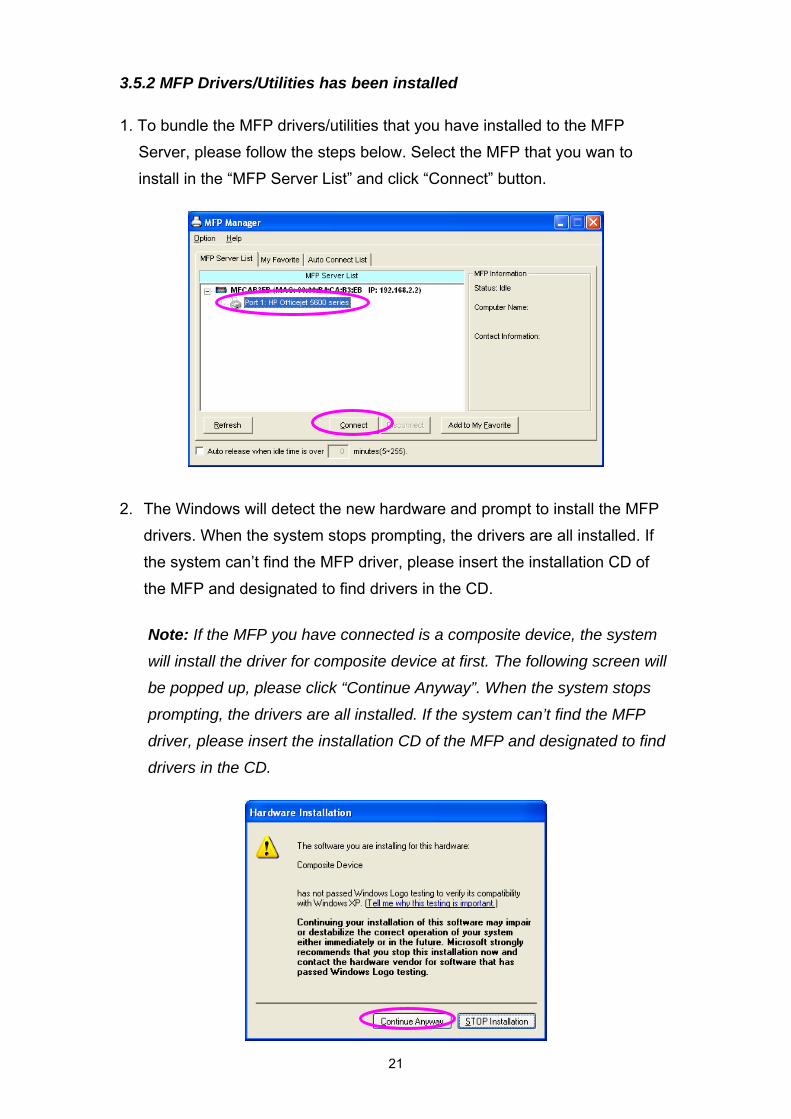
1. To bundle the MFP drivers/utilities that you have installed to the MFP
Server, please follow the steps below. Select the MFP that you wan to
install in the “MFP Server List” and click “Connect” button.
2. The Windows will detect the new hardware and prompt to install the MFP
drivers. When the system stops prompting, the drivers are all installed. If
the system can’t find the MFP driver, please insert the installation CD of
the MFP and designated to find drivers in the CD.
Note: If the MFP you have connected is a composite device, the system
will install the driver for composite device at first. The following screen will
be popped up, please click “Continue Anyway”. When the system stops
prompting, the drivers are all installed. If the system can’t find the MFP
driver, please insert the installation CD of the MFP and designated to find
drivers in the CD.
22
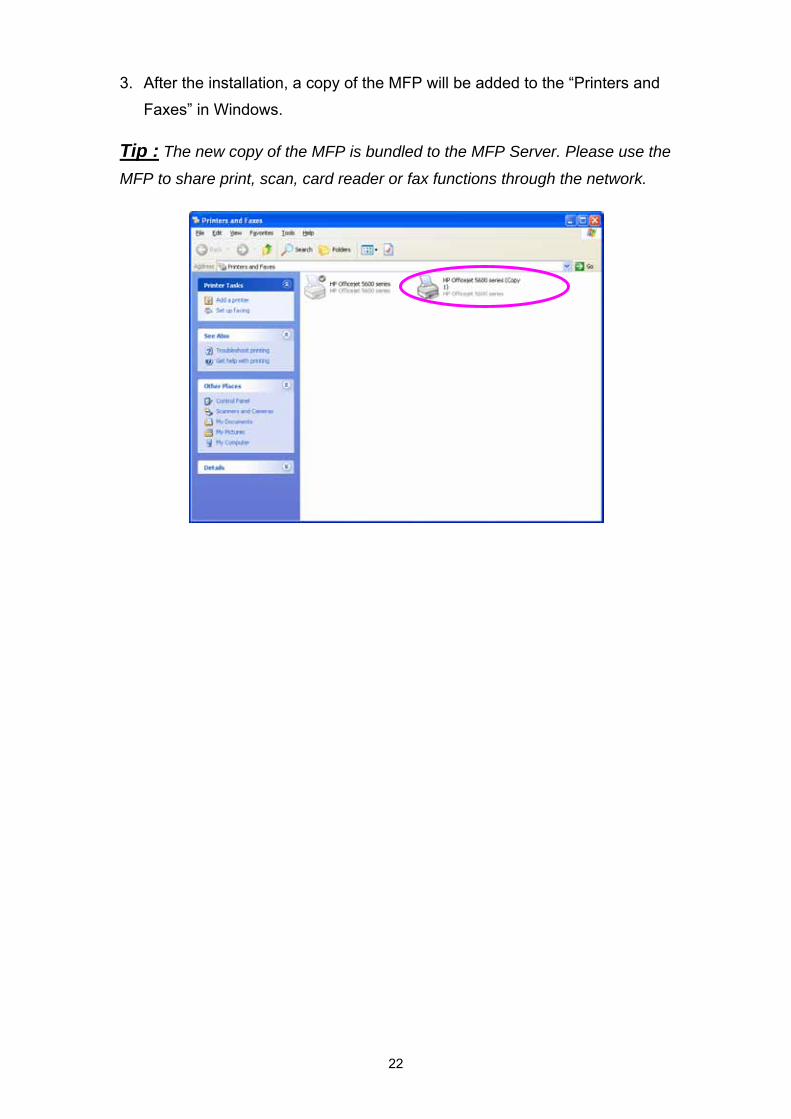
3. After the installation, a copy of the MFP will be added to the “Printers and
Faxes” in Windows.
Tip : The new copy of the MFP is bundled to the MFP Server. Please use the
MFP to share print, scan, card reader or fax functions through the network.

23
4. Using the MFP
After the installation is completed, the MFP can be connected to your
computer by pressing the connect button. You can start sharing print, scan,
card reader or fax functions provided by the MFP. Please make sure you have
clicked on connect button when you would like to use functions like scanning
and faxing since a direct connection is needed in order to perform those
functions. However, for printing, you are not required to use the MFP utility as
the “windows add a printer” wizard would have made a direct connection from
your machine to the print server. Simply just choose the correct printer to
print from if you would like to print.
Tip 1: If you have finished using the MFP, please click “Disconnect” to
release the MFP. Another users can’t use the MFP until the MFP is released.
Tip 2: It is recommended to enable “Idle Timeout” setting. The MFP Server
will auto release your connection to the MFP after a period of idle time that
you have assigned. So the MFP will not be occupied too long and other users
can share the MFP frequently. Please refer to Section 6.1 in the manual for
more information.
24
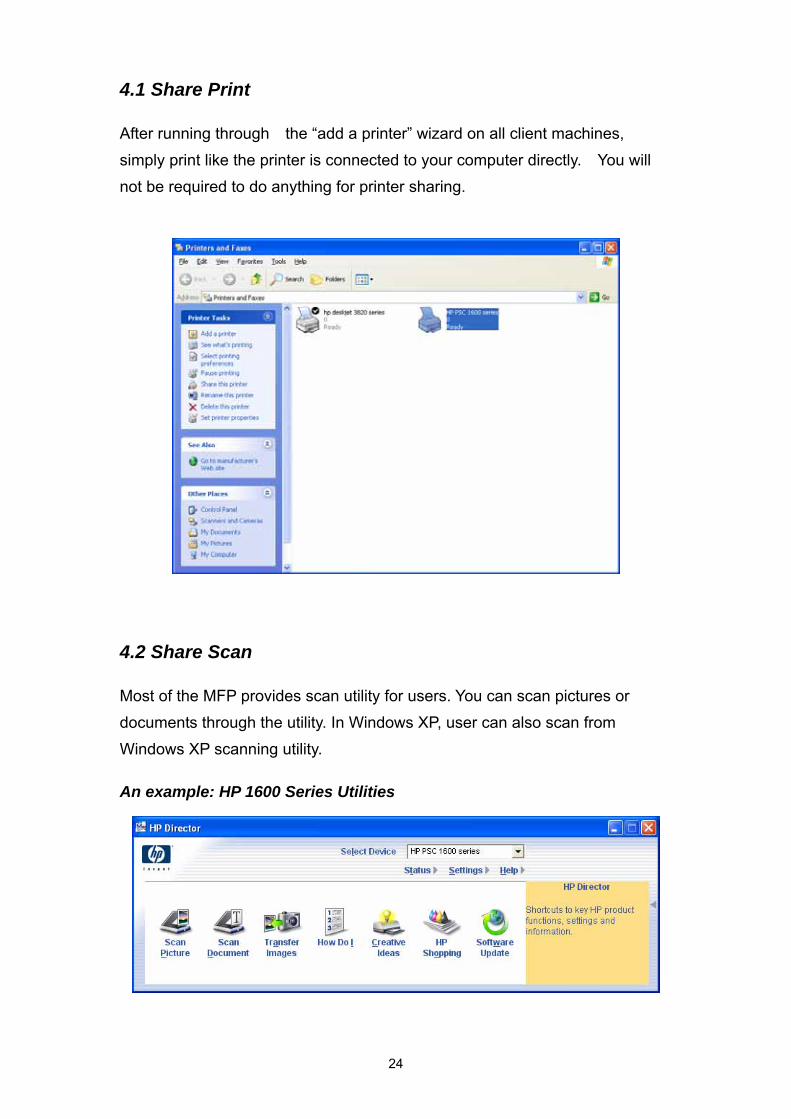
4.1 Share Print
After running through the “add a printer” wizard on all client machines,
simply print like the printer is connected to your computer directly. You will
not be required to do anything for printer sharing.
4.2 Share Scan
Most of the MFP provides scan utility for users. You can scan pictures or
documents through the utility. In Windows XP, user can also scan from
Windows XP scanning utility.
An example: HP 1600 Series Utilities
25
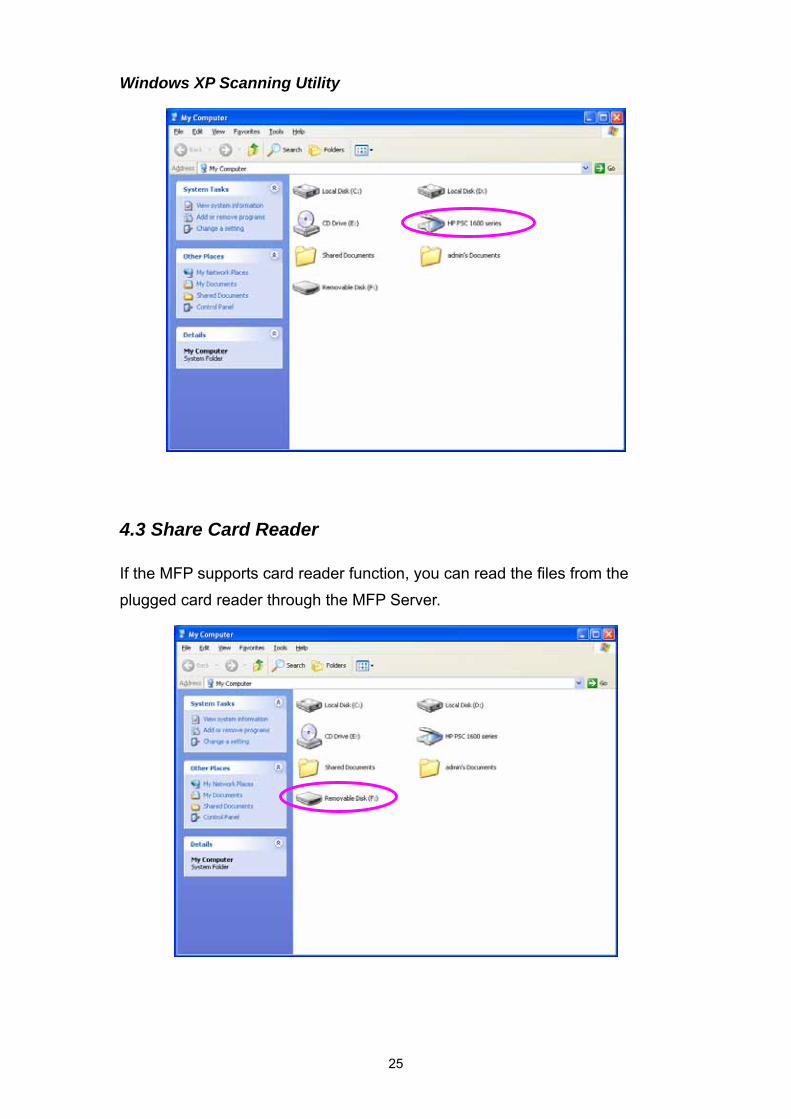
Windows XP Scanning Utility
4.3 Share Card Reader
If the MFP supports card reader function, you can read the files from the
plugged card reader through the MFP Server.
26
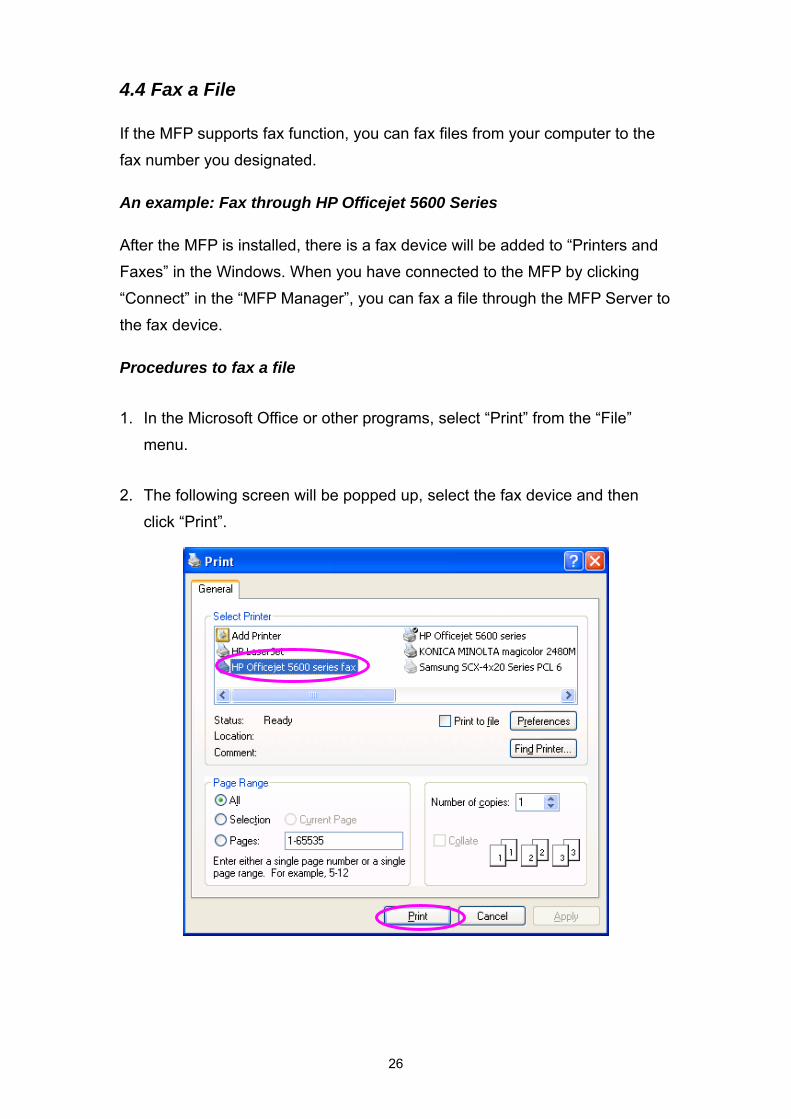
4.4 Fax a File
If the MFP supports fax function, you can fax files from your computer to the
fax number you designated.
An example: Fax through HP Officejet 5600 Series
After the MFP is installed, there is a fax device will be added to “Printers and
Faxes” in the Windows. When you have connected to the MFP by clicking
“Connect” in the “MFP Manager”, you can fax a file through the MFP Server to
the fax device.
Procedures to fax a file
1. In the Microsoft Office or other programs, select “Print” from the “File”
menu.
2. The following screen will be popped up, select the fax device and then
click “Print”.
27
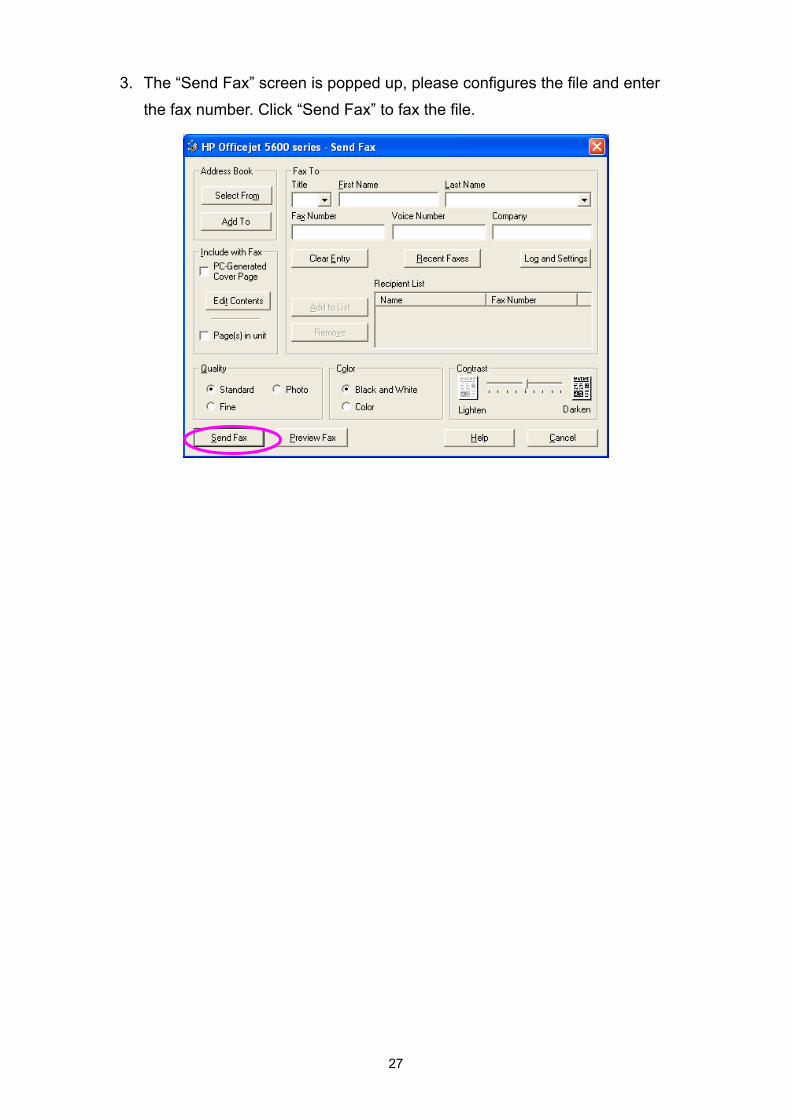
3. The “Send Fax” screen is popped up, please configures the file and enter
the fax number. Click “Send Fax” to fax the file.


